Thank you for purchasing the UpBloom Plant Therapy Kit for easy repotting of all of your house plants.
A simple how-to on repotting house plants:
When repotting houseplants, there are several suggestions to ensure the process goes smoothly and promotes the health of your plants. Here are some guidelines to follow:
Choose the right time: Spring is generally the most common time to repot most houseplants, but plants can be repotted at any time so long as it coincides with their active growth period. If possible avoid repotting your plants during the dormant season or while they are flowering.
Select the right pot: Choose a pot that is slightly larger than the current one, providing enough room for the roots to grow. Ensure that the new pot has drainage holes to prevent waterlogging.
Prepare the new pot: Before transferring the plant, clean the new pot thoroughly. If the pot is used, wash it with mild soap and water to remove any potential pests or diseases.
Gather necessary materials: Gather all the supplies you'll need, including potting potting mat, potting soil components, tools and, watering can. Also a saucer or tray to catch excess water is always a good idea to help protect the surfaces your plant will be placed on.
Water the plant: Water your plant thoroughly a day or two before repotting. This ensures the roots are well-hydrated and helps the plant handle the stress of repotting.
Remove the plant from its current pot: Gently tap or squeeze the sides of the pot to loosen the plant. Carefully turn the pot upside down while supporting the plant's base, and let gravity help the plant slide out. If it's stubborn, you can use a trowel or spoon to loosen the edges without damaging the roots.
Inspect the roots: Check the root system for any signs of rot, pests, or diseases. Trim off any brown, mushy, or damaged roots using clean, sharp scissors or pruning shears. Healthy roots appear firm, white, or light brown.
Add fresh potting soil: Mix your customized potting soil according to its needs, see our recommendations within Soil mixing suggestions. Place a layer of fresh, well-draining potting soil at the bottom of the new pot. Adjust the amount to ensure the plant's base sits at the desired height.
Position the plant: Gently place the plant in the center of the new pot, making sure it's upright and at the desired depth. Add more potting soil around the sides, gently firming it to eliminate air pockets. Leave some space at the top for watering.
Water and settle the soil: Give the plant a good soak after repotting to help settle the soil. Allow the excess water to drain out, and empty the saucer or tray to prevent waterlogging.
Inspect the leaves and stems: Check greens of the plant for any signs of rot, pests, or diseases. Trim off any brown, dead, or damaged leaves using clean, sharp scissors. If signs of disease are present look identify the condition and treat the overall plant as recommended.
Post-repot care: Place the repotted plant in an appropriate location with the right light and temperature conditions for its specific needs. Avoid direct sunlight for a few days to minimize stress. Resume regular watering, fertilizing and care routine once the plant has settled.
Remember that these are general guidelines, and some plants may have specific repotting requirements. Always consider the individual needs of your houseplants and research any unique care instructions for each species.
Suggested Soil Mixing Guidelines:
Our suggested soil mix for houseplants provides for good drainage and aeration and feeding. It consists of coco coir disks that have been expanded in water, our UpBloom Super Humus compost, and perlite. The basic mix which will work for many house plant varieties is a ratio of 60% Coco Coir, 20% Super Humus Compost and 20% Perlite: Here's a general recipe you can follow:
Coco coir: Use approx. 60% coco coir as the primary ingredient in the mix. Coco coir is an ecofriendly sustainable alternative to peat moss and provides good moisture retention while allowing excess water to drain away. To use place one disk in a 2 quart container, and slowly add 2 cups warm water (not to exceed 100 degrees), over the course of three minutes the coco coir will absorb and expand to a loose soil, add a bit more warm water if needed.
Compost: Add to the expanded Coco Coir approx. 20% of the Super Humus compost to the mix. Our Super Humus improves soil fertility, adds organic matter, and contributes to the overall health of the plants.
Perlite: Include 20% perlite in the mix to enhance drainage and aeration. Perlite is a lightweight volcanic mineral that helps prevent soil compaction and allows air to reach the plant roots.
To create the mix, thoroughly combine the three components in a container. Mix them together until well-blended, ensuring an even distribution of the ingredients.
You can adjust the ratios slightly based on the specific needs of your plants or personal preferences.
It's worth noting that certain plants may have specific soil requirements, we have provided some additional suggestions (below) on how to best customize the soil for your particular plants, as well it's always a good idea to research the specific needs of your houseplants.
| Custom Soil Mixes and Growing Condition Guidance | |||
| Succulents & Cacti | Orchids | Aroid Family | Peace Lily |
| Snake Plant | Ferns | ZZ Plant | African Violets |
| Spider Plants | Edible Indoor Herbs & Vegetables | Cannabis | |
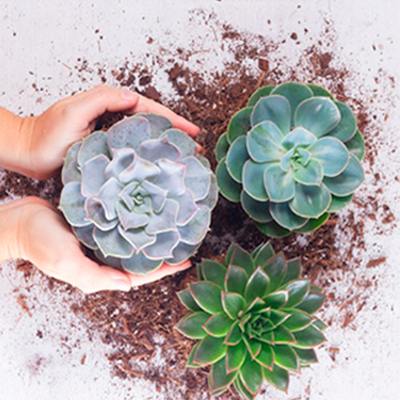 |
Succulents and Cacti:
An ideal soil mix typically consists of a similar combination of coco coir, humus/compost, and perlite. Below is a suggested soil mix percentage and growing conditions. |
Soil Mix:
Coco Coir: Use approx. 50% of coco coir in the soil mix. Remember Coco coir is an excellent alternative to peat moss and helps retain moisture while providing good drainage. It also improves aeration and is more sustainable.
Compost: Add approx 15% of compost to the soil mix. Compost enriches the soil with organic matter and nutrients, promoting healthy growth.
Perlite: Include 35% of perlite in the soil mix. Perlite aids in drainage, prevents soil compaction, and promotes aeration around the plant's roots. It helps prevent waterlogging, which is crucial for succulents and cacti.
Adjust the percentages of these components based on the specific needs of your plants and the environmental conditions in your area. Some species may prefer a higher percentage of perlite for enhanced drainage.
Growing Conditions:
Light: Succulents and cacti thrive in bright light conditions. Place them near a south or west-facing window where they can receive at least 4-6 hours of direct sunlight per day. If natural light is insufficient, supplement it with artificial grow lights suitable for succulents and cacti.
Temperature: Most succulents and cacti prefer warm temperatures. Maintain an environment with temperatures ranging between 60°F (15°C) to 80°F (27°C). They can tolerate slightly cooler temperatures during the winter but should avoid freezing conditions.
Watering: Succulents and cacti are adapted to arid environments and require infrequent watering. Water the plants thoroughly but allow the soil to dry out completely between waterings. It's better to underwater than overwater, as excess moisture can lead to root rot. Adjust the watering frequency based on the specific needs of each plant and the environmental conditions.
Humidity: Succulents and cacti prefer low humidity environments. Avoid placing them in areas with high humidity, such as bathrooms or kitchens, as excessive moisture can promote fungal diseases. Proper air circulation helps control humidity levels around the plants.
Air Circulation: Good air circulation is important for preventing stagnant air and promoting transpiration. Ensure proper airflow around your plants by providing space between them or using a small fan for gentle air movement.
Remember to monitor your plants closely and adjust the growing conditions as needed based on their individual requirements. Each species may have specific preferences, so it's advisable to research the needs of the specific succulents and cacti you are growing to provide the best care.
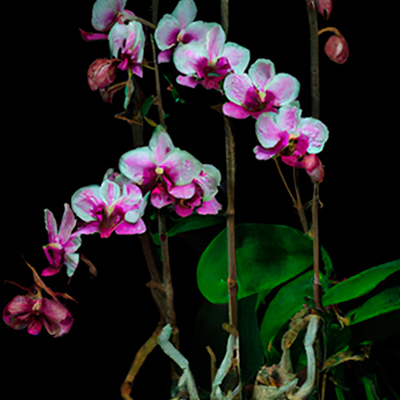 |
Orchids:
Orchids will enjoy an ideal soil mix typically consisting of a combination of coco coir, compost, and perlite or other suitable orchid growing media. Below is a suggested soil mix percentage and growing conditions for orchids: |
Soil Mix:
Coco Coir: Use 60-65% of coco coir in the soil mix. Coco coir provides good moisture retention while allowing for proper drainage. It also helps create a light and airy substrate, which is beneficial for orchid roots.
Compost: Incorporate 10-15% of compost or organic matter into the soil mix. Organic matter helps improve soil structure, provides nutrients, and enhances moisture retention. Some popular choices for organic matter in orchid mixes include bark chips, sphagnum moss, or leaf litter.
Perlite: Include 25% of perlite, or other orchid-specific growing media like bark chips can be added if they are on hand. These components help enhance drainage, aeration, and root ventilation, which are crucial for orchids.
The specific percentages of each component can vary depending on the type of orchid, its moisture requirements, and the growing conditions in your area.
Growing Conditions:
Light: Orchids generally require bright, indirect light. Place them near an east or west-facing window where they can receive filtered sunlight for several hours a day. Avoid exposing them to direct, intense sunlight, as it can burn the leaves.
Temperature: Orchids have varying temperature preferences depending on their species or hybrids. In general, most orchids thrive in temperatures between 60°F (15°C) to 80°F (27°C) during the day. Some orchids, such as Phalaenopsis, appreciate slightly warmer temperatures, while others, like Cymbidiums, can tolerate cooler conditions.
Humidity: Orchids prefer higher humidity levels. If the humidity in your home is low, you can increase humidity around the orchids by using a humidifier, placing the pots on trays filled with water and pebbles, or misting the foliage regularly. Avoid misting Phalaenopsis orchid flowers to prevent them from rotting.
Watering: Orchids have specific watering needs. Allow the potting mix to dry out partially between waterings, but do not let it completely dry out. It's crucial to water orchids properly to avoid overwatering, which can lead to root rot. Never let your orchids sit in saturated soils. One common approach to help avoid over watering is to water your orchid with ice cubes, start with three cubes per week and keep an eye on your plant to make sure its not drying our too much in between waterings.
Air Circulation: Orchids require good air circulation around their roots and foliage. Proper ventilation helps prevent stagnant air and fungal issues. Ensure there is adequate space between plants and provide gentle air movement using fans or by opening windows periodically.
Remember to research the specific care requirements of the orchid species you are growing, as each type may have unique needs.
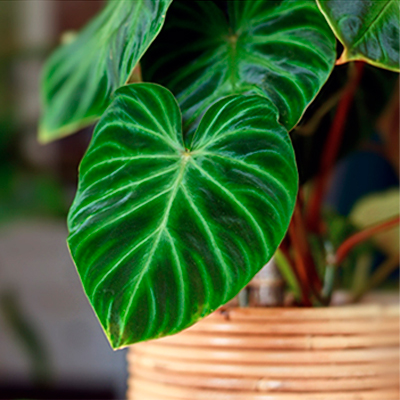 |
Plants of the Aroid Family:
For Aroids, such as Philodendrons, Monsteras, and Anthuriums, an ideal soil mix typically consists of the following combination of coco coir, compost, and perlite. |
Soil Mix:
Coco Coir: Use 50-55% of coco coir in the soil mix. Coco coir provides good water retention while allowing for proper drainage. It helps create a well-aerated and moisture-retentive substrate for Aroids.
Compost: Incorporate 20% of compost into the soil mix. Compost enriches the soil with organic matter and nutrients, supporting healthy growth and providing a nutrient source for Aroids.
Perlite: Include 25-30% of perlite in the soil mix. Perlite enhances drainage, prevents soil compaction, and promotes aeration around the roots of Aroid plants which is what they like. It helps maintain a well-drained growing medium.
Growing Conditions:
Light: Aroids generally prefer bright, indirect light. Place them near a bright window with filtered or indirect sunlight. Some Aroids can tolerate lower light conditions, but they may exhibit slower growth or have less vibrant foliage.
Temperature: Aroids thrive in average room temperatures ranging from 65°F (18°C) to 75°F (24°C). They can tolerate slightly cooler temperatures during the winter, but it's best to avoid exposing them to temperatures below 60°F (15°C).
Humidity: Aroids appreciate higher humidity levels. They are well-suited for environments with humidity ranging from 50% to 60%. If the humidity in your home is low, you can increase humidity around the plants by using a humidifier, placing the pots on trays filled with water and pebbles, or grouping them together.
Watering: Aroids prefer slightly moist soil. Water them thoroughly and allow the top inch of the soil to dry out before watering again. Avoid overwatering, as it can lead to root rot. Adjust the watering frequency based on the specific needs of each plant and the environmental conditions.
Air Circulation: Aroids benefit from good air circulation. Proper ventilation helps prevent stagnant air, fungal issues, and pest infestations. Provide gentle air movement using fans or by opening windows periodically to ensure fresh air circulation.
It's important to note that Aroids can have different care requirements depending on the species and hybrids. Research the specific needs of the Aroid houseplants you are growing to provide the best care and adjust the soil mix and conditions accordingly.
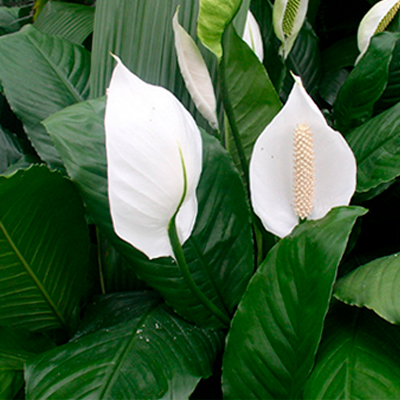 |
Peace Lily (Spathiphyllum):
Peace lilies prefer consistently moist soil but can suffer from overwatering if the soil remains too wet. A potting mix with a lower perlite percentage allows for better moisture retention while still providing adequate drainage. |
Soil Mix:
Coco Coir: Use approx 60-65% of coco coir in the soil mix. Coco coir helps retain moisture while providing adequate drainage. It also improves soil aeration and enhances water-holding capacity.
Compost: Incorporate 25-30% of compost into the soil mix. Compost aids in promoting healthy blooms and supports overall plant growth and vigor. Compost enriches the soil with organic matter and nutrients, promoting healthy growth and providing a nutrient source for Peace Lilies.
Perlite: Include 10% of perlite in the soil mix. Perlite aids in drainage, prevents soil compaction, and improves aeration around the roots of Peace Lilies. It helps maintain a well-drained growing medium.
Growing Conditions:
Light: Peace Lilies thrive in bright, indirect light. Place them near a window with filtered sunlight or in a location where they receive bright, indirect light for several hours each day. Avoid exposing them to direct sunlight, as it can scorch their leaves.
Temperature: Peace Lilies prefer average room temperatures ranging from 65°F (18°C) to 80°F (27°C). They are sensitive to cold drafts and temperature extremes, so avoid placing them near air conditioning vents or in areas with temperature fluctuations.
Humidity: Peace Lilies appreciate moderate to high humidity levels. They perform well in environments with humidity ranging from 40% to 60%. If the humidity in your home is low, you can increase humidity around the plants by using a humidifier, placing the pots on trays filled with water and pebbles, or grouping them together.
Watering: Peace Lilies prefer consistently moist soil, but they are susceptible to root rot if overwatered. Water them thoroughly when the top inch of soil feels dry, allowing excess water to drain away. Avoid letting the plant sit in standing water, as it can lead to root problems.
Air Circulation: Peace Lilies benefit from good air circulation. Proper ventilation helps prevent fungal issues and promotes healthy growth. Provide gentle air movement using fans or by opening windows periodically to ensure fresh air circulation.
Additionally, Peace Lilies are known to be tolerant of low-light conditions, making them suitable for areas with less natural light. They are excellent houseplants for low-light environments.
Remember to adjust the soil mix and care based on the specific needs and response of your Peace Lily. Monitor the plant closely and make adjustments as needed to provide the best growing conditions.
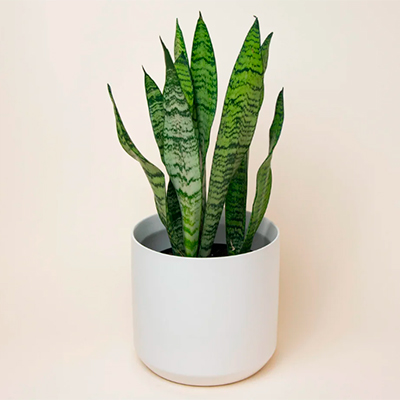 |
Snake Plant (Sansevieria):
Snake plants tolerate a wide range of soil conditions, including those with lower drainage. While they still benefit from well-draining soil, a lower perlite percentage combined with other organic materials, can provide suitable conditions for snake plants. |
Soil Mix:
Coco Coir: Use 65-70% of coco coir in the soil mix. Coco coir provides good moisture retention while allowing for proper drainage. It also helps create a well-aerated growing medium.
Compost: Incorporate 20% of compost into the soil mix. Compost enriches the soil with organic matter and nutrients, supporting healthy growth and providing a nutrient source for snake plants.
Perlite: Include 10-15% of perlite in the soil mix. Perlite enhances drainage, prevents soil compaction, and promotes aeration around the roots of snake plants. It helps maintain a well-drained growing medium.
Growing Conditions:
Light: Snake plants can tolerate a wide range of light conditions. They can adapt to low light environments but thrive in medium to bright indirect light. Avoid exposing them to direct sunlight for prolonged periods, as it can scorch their leaves.
Temperature: Snake plants prefer average to warm temperatures. They can tolerate temperatures ranging from 60°F (15°C) to 85°F (29°C). Protect them from cold drafts and avoid placing them in areas with temperature extremes.
Watering: Snake plants are drought-tolerant and prefer to dry out between waterings. Water them thoroughly, allowing the soil to dry almost completely before watering again. It's better to underwater than overwater snake plants to prevent root rot.
Humidity: Snake plants are adaptable to different humidity levels. They can tolerate low humidity environments but also thrive in moderate humidity. Average room humidity is generally suitable for snake plants.
Air Circulation: Good air circulation is beneficial for snake plants. Adequate ventilation helps prevent issues like fungal growth and pest infestations. Provide gentle air movement by opening windows or using a small fan to promote fresh air circulation.
Snake plants are known for their resilience and ability to tolerate neglect. They are considered low-maintenance houseplants. Adjust the soil mix and care based on the specific needs and response of your snake plant. Monitor the plant closely and make adjustments as needed to provide optimal growing conditions.
 |
Ferns:
Ferns, such as Boston Ferns and Maidenhair Ferns, prefer a moist potting mix that retains some moisture. While they still require good drainage, using a lower percentage of perlite in the potting mix can help retain moisture and create a suitable environment for ferns. |
Soil Mix:
Coco Coir: Use 60% of coco coir in the soil mix. Coco coir provides good moisture retention and aeration, helping to create a well-drained yet moisture-retentive soil for ferns.
Compost: Incorporate 30% of compost into the soil mix. Compost enriches the soil with organic matter and nutrients, promoting healthy growth and providing essential nutrition for ferns.
Perlite: Include 10% of perlite in the soil mix. Perlite improves drainage, prevents soil compaction, and enhances aeration around the roots of ferns. It helps maintain a well-drained growing medium.
Growing Conditions:
Light: Most ferns prefer indirect or filtered light. They thrive in bright, indirect light or moderate shade. Avoid exposing ferns to direct sunlight, as it can scorch their delicate fronds. Place them in a location with ample natural light but without direct exposure.
Temperature: Ferns prefer moderate temperatures. Most ferns thrive in temperatures ranging from 60°F (15°C) to 75°F (24°C). They can tolerate slightly cooler temperatures, but it's essential to avoid exposing them to drafts or sudden temperature fluctuations.
Humidity: Ferns appreciate high humidity levels. They are well-suited for environments with humidity ranging from 50% to 70%. To increase humidity around ferns, you can place a tray filled with water and pebbles near the plants or use a humidifier.
Watering: Ferns require consistently moist soil. Water them thoroughly when the top inch of soil feels slightly dry, but avoid waterlogging the roots. Ensure proper drainage and avoid letting the plant sit in standing water, as it can lead to root rot.
Air Circulation: Good air circulation is important for ferns to prevent fungal issues and ensure proper transpiration. Provide gentle air movement through natural ventilation or by using a fan set on low speed.
Ferns are diverse in their care requirements, so it's important to research the specific type of fern you have to ensure optimal care. Some ferns may have specific preferences for soil composition, light levels, and humidity. Monitor your fern closely and adjust the growing conditions as needed to provide the best care.
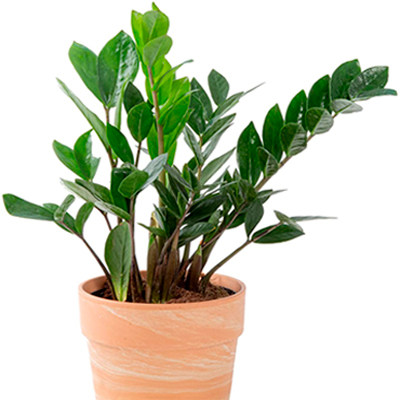 |
ZZ Plant:
ZZ plants are known for their drought tolerance and can can help maintain a slightly moist but well-draining environment for ZZ plants. |
Soil Mix:
Coco Coir: Use 60-65% of coco coir in the soil mix. Coco coir provides good moisture retention while allowing for adequate drainage. It helps prevent overwatering and root rot.
Compost: Incorporate 25% of compost into the soil mix. Compost enriches the soil with organic matter and nutrients, promoting healthy growth and providing essential nutrition for ZZ plants.
Perlite: Include 10-15% of perlite in the soil mix. Perlite aids in drainage, prevents soil compaction, and enhances aeration around the roots of ZZ plants. It helps maintain a well-drained growing medium.
Growing Conditions:
Light: ZZ plants can tolerate a wide range of lighting conditions, from low to bright indirect light. They are known to be one of the few plants that can thrive in low-light environments. However, they will grow best in bright, indirect light. Avoid exposing them to direct sunlight, as it can scorch their leaves.
Temperature: ZZ plants prefer average to warm temperatures. They can tolerate temperatures ranging from 60°F (15°C) to 75°F (24°C). Protect them from cold drafts and avoid placing them in areas with temperature extremes.
Watering: ZZ plants have rhizomes that store water, making them drought-tolerant. It's important not to overwater ZZ plants as they are prone to root rot. Allow the soil to dry out partially between waterings and then water thoroughly. It's better to underwater than overwater these plants.
Humidity: ZZ plants are adaptable to different humidity levels. They can tolerate low humidity environments but also perform well in average room humidity. They are not particularly demanding when it comes to humidity.
Air Circulation: Good air circulation is beneficial for ZZ plants to prevent stagnant air and promote healthy growth. Provide proper ventilation by opening windows or using a small fan to ensure fresh air movement.
ZZ plants are known for their resilience and ability to tolerate neglect. They are considered low-maintenance houseplants. Adjust the soil mix and care based on the specific needs and response of your ZZ plant. Monitor the plant closely and make adjustments as needed to provide optimal growing conditions.
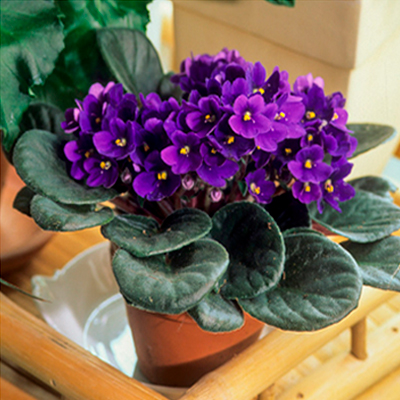 |
African Violets (Saintpaulia)
African violets thrive in slightly moist potting mix, and they are sensitive to overwatering. A lower percentage of perlite, around 10-15%, can help retain some moisture without causing excessive water retention. |
Soil Mix:
Coco Coir: Use 55% of coco coir in the soil mix. Coco coir provides good moisture retention while allowing for adequate drainage. It helps prevent overwatering and promotes healthy root development.
Compost: Incorporate 30% of compost into the soil mix. Compost enriches the soil with organic matter and nutrients, providing essential nutrition for flowering plants. It supports overall plant health and enhances flowering.
Perlite: Include 15% of perlite in the soil mix. Perlite improves drainage, prevents soil compaction, and enhances aeration around the roots. It helps maintain a well-drained growing medium, which is important for healthy root growth and flower production.
Growing Conditions:
Light: African violets and many flowering houseplants prefer bright, indirect light. Place them near a north or east-facing window where they can receive bright, filtered light. Avoid exposing them to direct sunlight, as it can scorch their leaves.
Temperature: African violets and flowering plants generally thrive in temperatures ranging from 65°F (18°C) to 75°F (24°C). Maintain a consistent temperature and protect them from cold drafts or extreme temperature fluctuations.
Watering: African violets and flowering plants prefer slightly moist but not waterlogged soil. Water them when the top inch of soil feels dry, allowing excess water to drain away. Avoid wetting the leaves, as it can lead to leaf spots or rot.
Humidity: African violets and certain flowering plants appreciate higher humidity levels. You can increase humidity by placing a tray with water and pebbles beneath the plants or using a room humidifier. Mist the leaves occasionally to provide additional moisture.
Fertilization: Regular feeding with a balanced, Supplement the nutrient content in the soil mix by adding 3-5 tablespoons of our Humus Compost every 4 to 6 weeks as a slow-release organic fertilizer. This helps provide the necessary nutrients for healthy blooms. Avoid over-fertilizing as it can lead to salt buildup and damage the plants.
Pruning and Deadheading: Remove spent flowers and prune as needed to promote continued blooming and maintain the desired shape of the plants.
Monitor your African violets and flowering plants closely for any signs of stress or pests. Adjust the soil mix and care based on the specific requirements of each plant. With proper attention and care, these houseplants can provide beautiful blooms and vibrant foliage.
 |
Spider Plants
For Spider plants, an ideal soil mix often consists of a combination of coco coir, compost, and perlite. Here's a suggested soil mix percentage and growing conditions for spider plants:. |
Soil Mix:
Coco Coir: Use 60% of coco coir in the soil mix. Coco coir provides good moisture retention while allowing for proper drainage. It helps prevent overwatering and promotes root health.
Compost: Incorporate 25% of compost into the soil mix. Compost enriches the soil with organic matter and nutrients, providing essential nutrition for spider plants. It supports their growth and overall health.
Perlite: Include 15% of perlite in the soil mix. Perlite improves drainage, prevents soil compaction, and enhances aeration around the roots of spider plants. It helps maintain a well-drained growing medium.
Growing Conditions:
Light: Spider plants thrive in bright, indirect light. Place them near a window with bright, filtered light, but avoid exposing them to direct sunlight, as it can scorch their leaves. They can tolerate lower light conditions but prefer brighter settings for optimal growth.
Temperature: Spider plants prefer moderate temperatures ranging from 60°F (15°C) to 75°F (24°C). They can tolerate slightly cooler temperatures but should be protected from drafts and extreme temperature fluctuations.
Watering: Spider plants prefer evenly moist soil. Water them thoroughly when the top inch of soil feels dry, allowing excess water to drain away. Avoid overwatering or waterlogging the roots, as it can lead to root rot. Spider plants are forgiving and can tolerate occasional drying out between waterings.
Humidity: Spider plants are adaptable to different humidity levels. They can tolerate average room humidity but appreciate slightly higher humidity. If the air in your home is dry, you can increase humidity by misting the leaves or placing a tray with water and pebbles near the plant.
Fertilization: Spider plants benefit from regular feeding with a balanced, water-soluble fertilizer. Apply the fertilizer according to the manufacturer's instructions during the growing season (spring and summer) to support their growth and foliage development. Avoid over-fertilizing, as it can cause fertilizer burn.
Propagation: Spider plants are known for producing "spiderettes" or baby plants that can be propagated. These spiderettes can be planted directly in the soil mix or placed in water until they develop roots. Once established, they can be treated as mature spider plants.
Spider plants are relatively easy to care for and adapt well to various indoor conditions. Adjust the soil mix and care based on the specific needs of your spider plant and observe its response to ensure optimal growth.
